All Blogs
The Most Asked Questions About Painting

Jul
Lots of painting questions to be answered!
When you first start painting, it can be a little bit confusing. There is so much to know and so many different techniques and styles that you might not know where to begin. That’s why there are so many questions out there about how to paint, what to paint and how to do it properly.
But with so many different answers being thrown around, it can be hard to know who or what to trust. To help you get started on the right foot, here are some of the most asked painting questions answered.
Questions about painting table of contents:
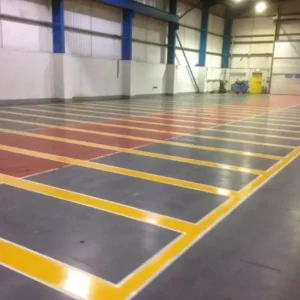
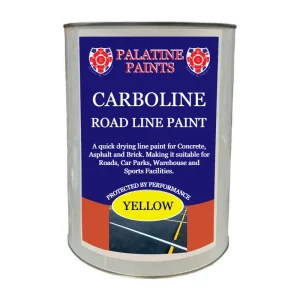
- How long does it take for paint to dry?
- How much paint do I need for my project?
- I want to change the look of my kitchen, can I paint my kitchen cupboards/cabinets?
- Can I paint my old garden furniture?
- What are the kind of materials I would need to have ready to paint?
- What are the usual mistakes people make when painting?
- What are low sheen paints and how do they compare?
- My radiator looks old, can I paint the radiator or do I need to replace it?
How long does it take for paint to dry?
Usually, interior wall paints dry in 1 – 2 hours, depending on the paint type, the weather, and other variables such as your surface temperature, this plays a big role in drying times. For example, in the middle of summer with extreme temperatures and using a dark colour outside, the paint will dry too fast and cause problems, chemicals by this heat can be released far quicker than they should and that could ruin the top coat. If you’re planning on painting, we recommend that you wait at least two hours between coats if you’re painting a second coat and always take note of the weather and variables. Most of the consumer-type paints which you use in your home can be touched within an hour. When the paint has cured, that means it isn’t completely dry, but dry enough to apply another coat.
- Acrylic-based paints may take four to six hours to completely dry
- Water-based alkyd can take six to eight hours
- Some solvent-based can take as long as 24 hours
Tip: If you’re using water-based paint, ventilation & airflow will help improve the drying times!
How much paint do I need for my project?
If you are planning on painting a room, the easiest way to find out is to get your tape measure and measure the width X height. Check the coverage on the back of the paint tin then divide the area by the coverage rate on the tin, do not forget that depending on the condition of the walls, you’ll likely and commonly need 2 coats. We like to say that the general rule of thumb, even before working out the area size is 4.5l for every 25m², but again this will depend on the condition of the walls and the type of paint you’re using. Here are some tips for you to use:
- The right size roller gives you more coverage and a better result, a 9” roller and a pole are recommended for water-based paints.
- Roll your paint on the wall in a W pattern being generous with the paint
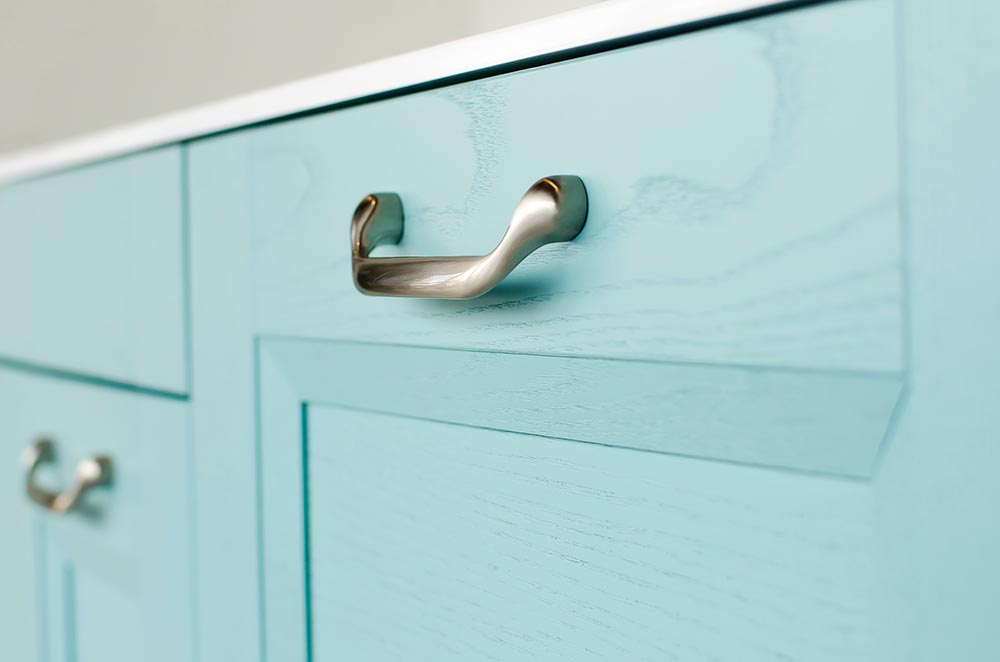
I want to change the look of my kitchen, can I paint my kitchen cupboards/cabinets?
Yes absolutely, our self-manufactured Kitchen Cupboard paint is in the best sellers and for a good reason. Many kitchens cost a fortune to completely replace so we’ve seen a trend-setter more recently of homeowners taking the time to completely change the look of their kitchen simply by painting the cupboards.
A quick guide:
- Number the doors and cabinets so you know where to replace them from step 2, you might find it easier to create a quick plan by hand of numbers and locations.
- Take the handles off the doors, hinges etc and then remove all the doors, laying them out in an open space to give you good room to work with
- Clean everything that will be painted, the doors you’ve taken off and the carcasses
- If you are painting over an existing colour, on raw wood or a surface area that isn’t varnished then you wouldn’t need to sand the cupboards. You might find you’ve got some small damage or old paint is peeling, you should only apply light sand using 120-grit which will rough up the area enough for you to apply a primer.
- Clean all the doors you’ve sanded down, ensuring there’s no dust/dirt.
- Apply masking tape to all of the areas you don’t want paint on
- Choose a colour from our stunning variation with some examples being Blossom, white, porcelain blue, sage green, teal green, charm pink, sapphire blue, sunflower yellow steel blue and more, with a gloss or satin/eggshell finish.
- Apply your first coat, wait for the drying time and then apply a second coat.
- Put your handles, hinges and any other furniture you have removed back.
- Enjoy the fruits of your labour and invite guests over to show that off!
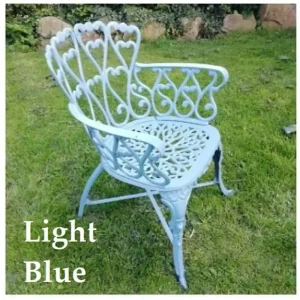
Can I paint my old garden furniture?
You certainly can and we even have a guide on how to do so: https://www.palatinepaints.co.uk/painting-your-outdoor-wooden-furniture. We all spend so much time deciding on how the inside of our house should look but forget how important it is to enjoy a refresh of your garden furniture. Any excuse for a garden party! In our blog, we cover some Q&A and then a step-by-step guide on how to paint your garden furniture like a pro. The main product that we cover is again one of our best sellers, a Palatine manufactured Professional garden furniture paint, we have a stunning range of colours to choose from.
What are the kind of materials I would need to have ready to paint?
Preparation is the key to everything, no matter what you’re planning on doing.
- Rollers / Brush and Roller Sets
- Paint brushes
- Trays
- Painters tape / Masking tape
- Dust sheets
- Overalls and Gloves
- Scrapers & Knives
- Paint stirrers
With all these tools at hand, it is now time to decide on the colour that you want to paint your room(s). Why not have a read through our guide for 14 top tips on painting your home like a professional as we discuss tricks to use and how to manage your project.
Question 6: What are the usual mistakes people make when painting?

-
Trying to cut costs by buying poor-quality paints that are cheap.
What’s the difference and why does it matter?
The paint contains pigments, resins, and solvents. Higher quality paints use smaller and purer pigments to conceal the surface on which it is applied. Cheap paint uses larger and poorer pigments to provide a double coat on a wall (this saves you time). Resins bind the pigments together and produce a coating. Higher quality resins create a longer-lasting finish in high-end paint. The amount of resins and pigments in paint is determined by the amount of solvent used.
Solvents are used to deliver the resins and pigments in paint. The solvent evaporates, leaving behind the resins and pigments behind, since cheap paint has less of these materials per gallon, it has even fewer as a result. It does make a difference.
This is why all of our Palatine manufactured paints are created with smaller and purer pigments, as a result, we have happy returning customers for all types of projects they undertake.
-
Removing masking tape at the wrong time
If you remove the masking tape when the paint is still wet then you’ll end up with a sticky mess and could leave marks or drips in the area you’ve avoided but if you leave the tape on for too long then the glue on the tape can easily bond to the wall/surface, you may find some of the paint that’s dried comes off with it! Try and aim to take the masking tape off when the paint is dry to the touch, typically after a minimum of 1 hour, always check the instructions on the back of the paint tin to help you understand the dry times. Tip: Take your time removing the tape, there’s no rush! Also, pull it at a 45-degree angle facing down.
-
Not cleaning the surface of where you want to paint
Preparing surfaces improperly is a common decorating mistake. You should always clear up cobwebs and clean walls with soapy water, and prepare them properly for a neat and professional job. For surfaces exposed to grease, use washing-up liquid or another degreaser to clean the grime away. Sugar soap spray can also be used to prepare walls in most situations. If you notice a growth of mould, please do not paint over it as it’ll just come through. You should be using a fungicidal wash, you can use this particular product on internal and external walls and surfaces. Ensure you wear gloves and allow enough time for it to dry before you start painting over. Going against cleaning the surface before painting will mean your hard work will go to waste, any dust, grime etc could affect the paint’s adherence to the walls, ceiling etc.
-
Not using a primer before painting
A porous surface should always be primed, even semi-porous surfaces. If you’ve just had the builders complete the new extension but decided to paint the walls yourself, you will likely be facing plasterboard – a very porous material. If you skip the primer and go directly to the first coat you’ll be wasting your time painting as all that will happen is the paint will soak through and you will not get the finish that you are looking for. Aim for 1 to 2 coats of primer.
What are low sheen paints and how do they compare?
Sheen in painting means the level of shine in a particular paint, here are the main sheen finishes that you can buy:
Flat | Matte | Eggshell | Satin | Semi-gloss | Gloss
The shinier the paint, the more durable it is which means glossy paint is far more durable than a flat or matte finish. This brings the question of why one would use a low sheen paint over a more durable one?
A low sheen paint hides imperfections in the surface being painted – most residential properties use low sheen on their ceilings and look nice as it absorbs light, giving a soft finish.
Matte vs Eggshell
Matte paint is the favourite for walls in a low traffic area, it aids in hiding lap marks but people do like an eggshell finish too for the same type of finish and it is easier to clean. Because of the higher sheen levels and durability in eggshells, it is recommended to use this type in high-traffic areas such as your kitchen or bathroom. Matte works well in your living room and bedrooms!
Satin
With satin paint being a mid-sheen, you’ll get a smooth silklike finish that is slightly glossier than eggshell. It can withstand a good clean from time to time so it is suggested to use this in a high traffic area, mostly used on wood.
We have manufactured our own high-quality professional satin finish paint that can be used on wood and metal in various colours.
Semi-gloss & Gloss
The number one prefered finish on trims such as window frames, window ledges, and door frames as these areas are considered high-touch surfaces, you can easily wipe them down if they got dirty!
As you’ll already know, gloss paint has a nice shiny finish to it which looks nice against an oak door.
My radiator looks old, can I paint the radiator or do I need to replace it?
If you want to spruce up your old radiators then painting is the ultimate solution, especially because you can change the look of an entire room by choosing your colour! A popular product is our Palatine Professional Radiator and Appliance Paint as you can choose over 20 different colours and also available as a spray paint Quick guide time:
- If you’re planning on painting your radiator, ensure the heating is off and the radiators are cool. Sounds obvious but it happens! If the radiators are warm you’ll have problems with dripping paint
- Open up all windows for good ventilation as the paints used are solvent-based, wear a mask if you wish.
- Clean and dust it as much as you can, even in the tough-to-reach parts.
- Protect the working floor area with dust sheets! No matter how careful you’ll try to be the paint will splash and you may find specks of paint when coming to clean up
- Sand the radiator using both a high-grit and low-grit just to roughen up the surface which will make the paint adhere to it easier. Remove all raised old paint edges and marks if they’re visible.
- Prime the radiator, depending on how bad the surface is you may need 2 coats.
- Apply the top coat in your chosen colour.
Tip: Always try and paint in the direction of the grooves or panels on the radiator.
BUY YOUR GARDEN FURNITURE PAINT
Garden Furniture Paint
Exterior Wood Paint
Anti Rust Primer
Palatine Professional Garden Furniture Paint is a solvent based protective topcoat designed for use on various types of garden furniture such as wooden and metal chairs, tables and benches.
- Satin or Matt Finish
- Available in a wide variety of colours
- RAL and BS colour matching also available
- Also available in an aerosol