All Blogs
Tractor and Implement Paint: Everything You Need to Know

Jul
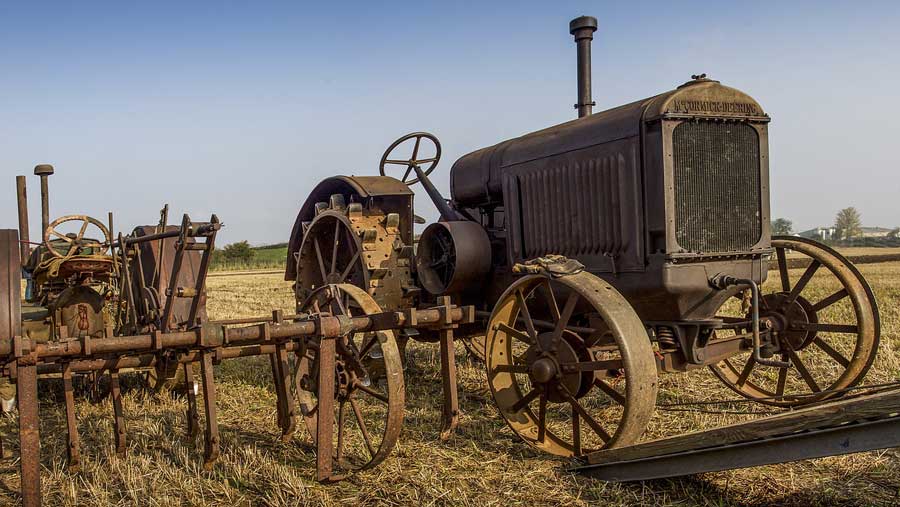
Painting your tractor for a fresh look!
It’s not every day you get to paint a tractor. But if you own a farm, that’s exactly the kind of scenario you might find yourself in one day. And while it might seem like an unimportant task, painting your tractor is imperative for its longevity and general well-being. After all, what good is owning a functional and valuable piece of equipment if it looks like something from a horror movie?
Luckily, painting your tractor doesn’t have to be a terrifying ordeal either. It is a fairly straightforward process with only minor challenges along the way; this article will walk you through it step by step.
If you’ve got a John Deere, Massey Ferguson, David Brown, Landrover, JCB tractors etc and are looking to restore her back to new, this article is for you! We’ve broken it down into common questions and then a guide on how to start painting your tractor or fleet of tractors.
Your Questions Answered!
What tractors can be painted?
Any kind of tractor can be painted – from small tractors used for small areas of land to heavy machine tractors that are used for harvesting. Now, the types of paint you can use will vary depending on the type of tractor you have.
What type of paint should I use to paint my tractor?
We always recommend using an enamel-based paint, for its longevity and strength.
Enamel paints are usually long-lasting, air-dried, glossy finishes. They withstand high levels of use, abrasion, moisture, high temperatures, as well as frequent cleanings and moisture.
Enamel also describes an opaque, glassy coating that is baked onto metal or ceramic surfaces.
Although enamel paints and enamel-coated surfaces share the same characteristics for marketing purposes, enamel paints predate enamel-coated porcelain and ceramic surfaces in popularity. Our customers have trusted our own manufactured tractor paint formula for years which promises durability and water resistance. After painting, you’ll be left with a hard and shiny finish!
Fun Fact: The very first gas-powered tractor was built in 1892, by an inventor named John Froelich!
Is it worth painting my tractor?
As you might expect, painting your tractor has a lot of benefits. First and foremost, it protects it from rust and paint fade. What’s more, painting your tractor is relatively inexpensive when you compare it to the cost of a new tractor. That’s because a new tractor costs upwards of £10,000 and only commonly only comes with a two-year guarantee, whereas painting your old tractor is far more economical compared. Let’s not forget that deciding on painting your tractor also makes it look a lot better and gives you the opportunity to put your own touch on your workhorse.
You don’t want to go around driving a rusty old tractor that looks like it’s from the 1950s, do you?
Do I need to use a primer before painting my tractor?
We strongly suggest that a primer is applied before painting, this will create a sealed barrier to the material and also provide a smoother finish. Simply giving you another layer of protection. Our Carboxide metal primer is a perfect solution alongside our tractor paint.
How many coats of primer do I need to apply to my tractor?
Every manufacturer of paints has varied qualities, it is recommended to use the same manufacturer for both the primer and finish paint, depending on how you prepare the tractor before any type of painting, the suggested should be at 2 coats.
The 2nd coat is necessary as it’ll hide any difference in colours that can be seen under the initial tack coat, once that’s dry it’ll allow you to see if there are any kind of areas that might have been missed after the paint flow out and evaporated.
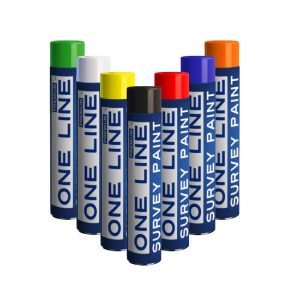
What colours can I paint my tractor?
Our Carbotrak High Gloss Tractor & Implement Paint has over 20 colours to choose from, we also can make any colour that you require, simply get in touch with us on the live chat or contact form.
Let’s jump into the guide on how to restore and paint your tractor!
Prepare the surface of your tractor properly in order to get a good result from the paint job you are planning. You may want to remove rusty patches and dents, as well as other blemishes from your tractors surface but some of those are only necessary if you’re looking for a new finish.
Here are 3 ways to get the body ready for painting:
- Sandblasting/Abrasive blasting, this is probably one of the quickest ways to clean up your old tractor, especially if you wanted to get to the bare metal – be warned though! It can get messy and it is easy to damage components and parts, be cautious as sand can get into places that you wouldn’t think is possible. If you want to sandblast then we suggest to take your tractor apart first or take it into a commercial sand blasting service.
- Sodablasting is a not as strong as sand blasting purely because of the use of sodium bicarbonate which is blasted against the tractors surface using compressed air.
- By hand, by using an angle grinder with poly discs, a hard plastic material which many companies sell. They’re fantastic for removing paint without damaging the sheet metal
You should also remove decals and emblems prior to painting, as they will make it more difficult to paint around and faster to finish the work.
In this guide, we’re going to assume the plan is to do this work by hand as the expense that comes with the first 2 options, especially commercially, is expensive compared to good old elbow grease (“hard physical work, especially vigorous polishing or cleaning” )
What you’ll need to achieve a great paint job:
- Make sure you have allocated enough time for this job, if your tractor is in bad condition then add more time. You’ll be able achieve great results if you do not rush.
- Masks & PPE – we have a dedicated category , paint fumes especially paint dust can be very dangerous.
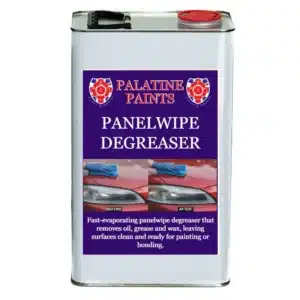
- ProXL Degreaser – A solution that will help you clean up any grease on the metal
- Angle grinder with a Poly Abrasive disc, ensure you get the right disc size to fit your grinder
- Tack cloths – Ideal for cleaning any dust or particles
- Sandpaper – the finer the better but you’ll need to work down the grits, you can go from anywhere between grit 60 up-to 400 wet/dry sandpaper. You will be using sandpaper to remove any old paint from hard to reach places or stubborn parts.
- Rust remover – in case you have stubborn parts that will not come off during sanding.
- Metal primer – our own brand has been carefully manufactured by us for the best application money can buy
- Carbotrak High Gloss Tractor & Implement Paint – A paint manufacturerd by design specificially for tractor, farm implement and equipment.
- Masking tape – keeping it neat.
What should you do to prepare for a tractor painting job, by hand?
The key is in the prep! We hope you’ve got an angle grinder stored away with all your other tools as you’ll need it to make this a perfect and not so difficult job. The disc to be used is important, poly abrasive types are what you are looking for, such as this one from Toolstation.
These discs are equipped with a synthetic resin coating and a unique structure that enables effective rust, paint, thermal blueing and other contamination removal.
Fibreglass backing absorbs vibration and creates this product an immensely sturdy one and hard-wearing. These unique items guarantee a minimal risk of scratching the bare metal, as they have a distinctive design, they are appropriate for a wide range of materials.
Using your angle grinder, start going over the areas that you want to remove the paint – aim to go in circled motions with gentle pressure or just enough pressure to remove the paintwork.
You would then want to use a lower grit sandpaper which is perfect for the hard to reach places the grinder couldn’t get to, gradually increase the grit number for a smoother finish.
Use a clean cloth to remove off any extra residue left over from the grinder/sanding and spray or wupe the metal with a degreaser to ensure maximum cleanliness.
If you’ve still got some hard to remove grease over the metal or existing paintwork, use ProXL Generation 20 degreaser to make the job easy.
A note to keep in mind: Metal can “flash rust” quickly, different kinds of salts and acids increase the conductivity of humidity making rust occur at a much quicker rate on bare metal.
It is tractor priming time…
We’ll jump straight in to the product, our very own manufactured carboxide metal primer available in 3 different colours is the one to use after you have followed the preparation steps above, based on alkyd resin that contains modified zinc phosphate and binding properties, you’ll have long term protection against rust and corrosion.
If you need a primer for non-ferrous metals then use a Fast Dry etching primer
In an earlier question, we said 2 coats of primer should be enough but we advise you to go between 2 and 3 depending on the condition of the metal you are painting on, this will seal what you’re painting so that the paint will not soak through.
Using masking tape, completely cover any areas that you do not wish to paint, while this is stating the obvious many do think they’re able to make a neat finish without the proper products. You don’t want to accidentaly paint your dashboard, fenders, lights, exhaust stack etc.
Cover your engine and tires with bags, rubbish bags are perfect.
Apply 1 coat of Carboxide metal primer, let that dry between 3 to 8 hours (surface dry / hard dry respectively), drying times can vary with low temperatures. Once this is dry, we recommend going over the coat with a light, high grit sand paper as it’ll give the top coat a more vibrant and nicer finish.
Apply 1 to 2 more coats of primer, again ensuring you stick by the drying time as explained on the tin. If you get stuck with hard to reach places that you were not able to sand, just ensure you prime that part.
Moving onto the top coat of tractor paint
Paint the area in 3 coats total, with the first being a light coat and then the final 2 coats in a medium / heavy application. Don’t be tempted to apply a coat that is too thick as it can scratch easier.
It is extremely important that you follow the drying times of the paint to keep the assurance of a nice finish.
What our customers love about our manufactured tractor and implement paint is the choice of colours and the excellent quality. We’ve got colours from White to Howard Green! Check it out: https://www.palatinepaints.co.uk/product/carbotrack-high-gloss-implement-paint/
Once you’re pleased with the final coat, remove all the masking tape you applied earlier and grab a coffee while you admire what you have just achieved.

Conclusion
We hope that this guide has helped you plan and paint your tractor and implements, we find the most important part of this type of project is not just using high quality paint products but making the right choice on the colour scheme.
Palatine paints would love to see your finished garden furniture projects, feel free to email them into us or connect with us on our socials!
We know there are countless more garden furniture products on the market but we’re able to give you honest and knowledgeable advice, credited by the history of Palatine Paints being in the industry for over 75 years as well as dedication to keeping all of our manufactured products to the highest possible standards of quality.
BUY YOUR TRACTOR PAINT TODAY
Agricultural
A solvent-borne, high gloss, protective finish for use on tractors, implements and machinery. Durable and hard wearing, Carbotrak is designed to leave the surface chip free even after the heavy usage endured by this kind of vehicle.
- Touch dry in 2 hours
- Excellent wet edge and flow out
- For most makes of tractor including: John Deere; Massey Ferguson; David Brown; Landrover, JCB etc
- Smooth and chip free surface
In above guide are you assuming the enamel paint is applied by brush or is a sprayer required?
Thanks for your question! You can absolutely apply the Carbotrak tractor paint by brush or roller. A sprayer can be used (and can speed things up especially for larger areas or areas with mny angles) but it’s not mandatory.
Here are a few pointers depending on your method:
Brush/Roller: Ideal for smaller areas, detailed work, or if you’re working indoors with moderate ventilation. Choose one appropriate for enamel paint (a synthetic-bristle brush or a high-quality foam or woven roller), keep the coats thin and even, and allow proper drying between coats.
Sprayer: Great for larger pieces or when you want a smooth, even finish with minimal brush mark. Ensure you mask off/cover surrounding areas, ventilate well, and ensure you use the correct tip and dilution for enamel.
Regardless of method: Proper surface preparation, primer (if required), and sufficient drying time are key to a durable finish.