All Blogs
How to Paint Your Garden Fence: A Step by Step Guide

May
Learn How to Paint Your Garden Fences Today
In modern gardens, fencing is often used as an architectural feature. It can also be a great way to add privacy and security to your outdoor space. Fences aren’t just functional though; they can be beautiful too!
That’s why so many gardeners are choosing to paint their fences this year. With the right materials, some prep work and a little time, you can transform your fence from drab to fab, with these simple painting tips.
You might think that painting a fence sounds complicated but it’s actually quite straightforward – and the results are stunning!
Common Questions Answered Before We Dig in!
Should i paint my fences with a brush a roller?
Using a paintbrush is the best choice for painting picket fences, but for painting garden fences, we recommend using a roller in addition to a paintbrush. Using this technique, you’ll be able to finish your fence in a hurry without wasting a lot of paint. Use the roller for flat areas, and use the fence brush for the edges.
Is it neccessary to paint both sides of the fence?
Feel free to paint whichever is your side, your neighbours are free to paint their side what colour they choose. If it is your fence on both sides, then paint away! From a wood protection point of view, ensuring you follow our guide below, painting your side the fence is enough.
What’s the most popular fence colour?
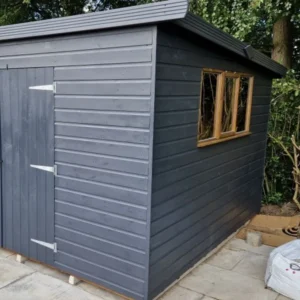
At the moment, the most popular colour is grey but many people still go for the original wood colour.
What should i do if it starts raining as i’m painting my fences?
Given the unpredictable weather in the UK, getting stuck with bad weather does happen fairly often! If this happens to you, obviously do not continue to paint. Wait it out and when the weather it good, apply a new coat to the fence to ensure a good finish and seal.
Should i pressure wash my fences to clean them?
We would say yes if you have access to a pressure washer, this really helps remove all dirt and stubborn debris meaning a more professional finish. If you do not have one, sand paper will suffice.
What You’ll Need To Start Painting Your Fence
Painting a fence is a DIY project that anyone can do at home, even if you’ve never done it before! To get started, you’ll need a few things:
Drop cloths/tarpaulins: To protect your grass from splatters and drips. Choose which size sheets you want here
Brushes/Rollers: For applying the paint evenly. Buy your block brush here or if you would prefer a kit then this 7″ Roller Kit is our recommendation.
Painting supplies: Such as a funnel, paint and a bucket. Our very own Palatine Paints Professional Shed & Fence Paint is highly rated and our best seller, with over 30 stunning colours to choose from, start your fence and shed painting project today.
Safety gear: For protecting yourself and your surroundings during your project. See our range of safety wear and PPE here
Towers or Ladders: if you have high fences or a difficult-to-reach areas.
Timer: To help you stay on track with your painting project.
A garden spade: For digging out roots/weeds.
Gravel: This can be used to cover the bottom of drop cloths to prevent paint from dripping through.
A garden hose: To provide water as you work.
Step 1 – Preparation: Sand and prime the fence
Before you paint your fence, you’ll need to clean and prep it! The very first job, get the lawnmower out to cut the grass and cut back any bushes or plants so that you can have easy access to the fences, it is very common for a paint job to mess up because the vegetation knocks the fences while you’re painting it.
Use a brush or a broom to remove any loose dirt and debris from the surface of the fence, you could even use a power washer to remove any stubborn debris from the surface.
Don’t forget to remove any hanging baskets on posts, trellis (that you don’t want to paint) and any fixings.
Next, you’ll want to sand the fence to create a smooth, even surface for the paint to adhere to. Use a hand-held orbital sander or also known as a power sander, or do the job by hand using sandpaper, try and use a medium-grit one or a 120 Grit if the fence already has a smooth surface.
The process of sanding will also open up the wood and give your fence a new look.
Protect the ground under with some sheeting, you can use dust sheets, old bed sheets or anything you can grab your hands on as it’ll protect the floor from any paint residue.
Is a primer neccessary?
For a lot of fence paints on the market, it is advised to use a primer but with our unique shed and fence paint, there’s no primer required!
You still may prefer to prime the fence anyway so continue reading this step. It’s critical to realise that using a primer will keep the fence from moulding and provide a professional finish.
A priming coat may be applied prior to painting in order to prevent mould growth, weathering and longevity, as well as acting as an adhesive to the paint you’re using.
- You may brush or roll on a layer of primer first. To avoid dripping or running across the fence, do not apply too much primer.
- Apply two thin coats of primer, this is far superior to one thick layer. Allow this layer to dry thoroughly, as per the directions on your paint tin. The process will normally take a couple of hours.
Note: Wait for the first coat of primer to dry before applying the second one. After the second coat is applied and dry, please remember to wait for it to dry before applying the paint of your choice.
Step 2: Decide on your colour scheme
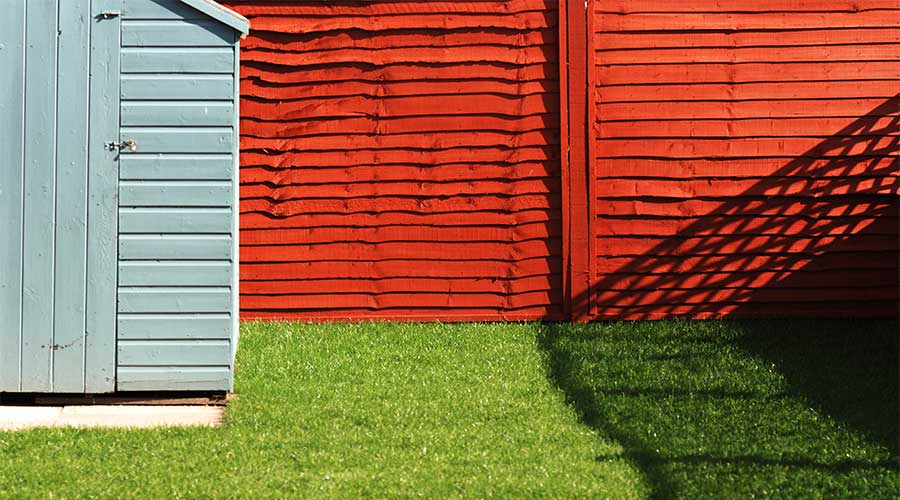
Before you start painting your fence, you’ll want to decide on a colour scheme. Painting your fence is a great way to add an artistic touch to your garden and can be a good way to add colour to your outdoor space.
Use it as an opportunity to match your fence to your front door. For guidance, you can use a colour wheel, which shows the relationships between colours.
You can also try different colour combinations out on a spare piece of wood to test the look. When you’ve found a colour scheme that you like, make a note of the colours so that you can get the right tester pots when you’re ready to paint.
As mentioned above, we manufacture our own high quality shed & fence paint which has over 30 colours to choose from, see below: 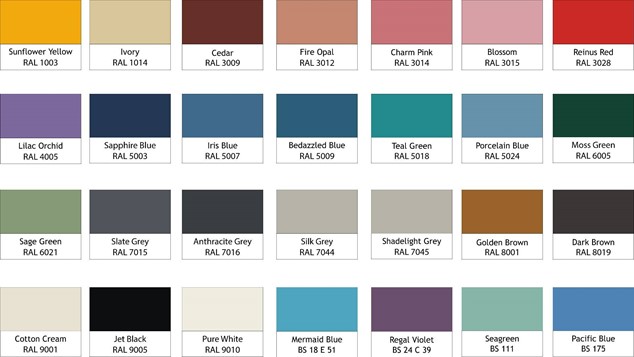
Step 3: Paint!
Now that your fence is clean, sanded and primed (2 coats remember), and you’ve decided on a colour scheme, it’s time to start painting!
There are two ways that you can approach this. You can either paint the fence one colour, or you can use a two-tone finish.
One-tone finish – To paint your fence one colour, you can use a brush or a roller to apply the paint. Depending on the wood and the paint you use, you may want to apply two coats of paint.
Two-tone finish – A two-tone finish looks really stylish and it’s very easy to do. Start by painting your fence a light colour (such as white). Once the first coat is dry, you can use a roller and a darker colour (such as black) to create a border along the top of the fence.
Painting fences with vertical sections, use your brush, roller, or paint sprayer vertically only. When painting horizontal sections, use your brush in the direction of the grain for a smoother finish with more coverage.
When working with lap boards, be careful when painting from top to bottom, especially near posts, as drips may easily fall through to the other side. Inspect hidden areas near posts to ensure you haven’t missed any spots.
Tip 1: Paint your fences by working your way from the top to the bottom and painting in the same direction as the panel. Don’t be afraid to use a lot of paint; just make sure that every part of your fence is coated evenly.
Tip 2: Prior to painting your fence, apply a tiny amount of paint to an area that is not too noticeable. Once it has dried, verify that you are pleased with the colour.
Buy your fence paint and accessories today!
Exterior Wood Paint

Paint Brush
Palatine Professional Shed & Fence paint is an oil based paint that provides a durable finish to a variety of outdoor wooden surfaces. It is ideal for painting fence panels, sheds, summerhouses and other outdoor wooden surfaces.
Our Professional Shed & Fence paint works to protect most types of wood from the effects of the weather and sunlight. With a long lasting finish, it acts as an alternative to products designed with initial appearance and costs in mind, which often comes at the cost of performance and opacity.
- Based on modified alkyd and linseed resin, (lead free) containing organic and inorganic pigments
- Solvent-borne, linoleic rich coating
- Touch dry in 3 hours
- Excellent wet edge and flow out
- No primer required
- Can also be used on concrete posts
- Available in 30 attractive colours including the highly popular Anthracite Grey RAL 7016
Conclusion
Palatine Paints have been manufacturing paints for over 75 years and have a dedicated technical and sales team to answer any questions you may have, about any number of our product ranges.
If you have any questions on the products we’ve listed here, our dedicated sales and/or technical team are here to help.
Email: sales@palatinepaints.co.uk
Call Us: 01942 884 122