All Blogs
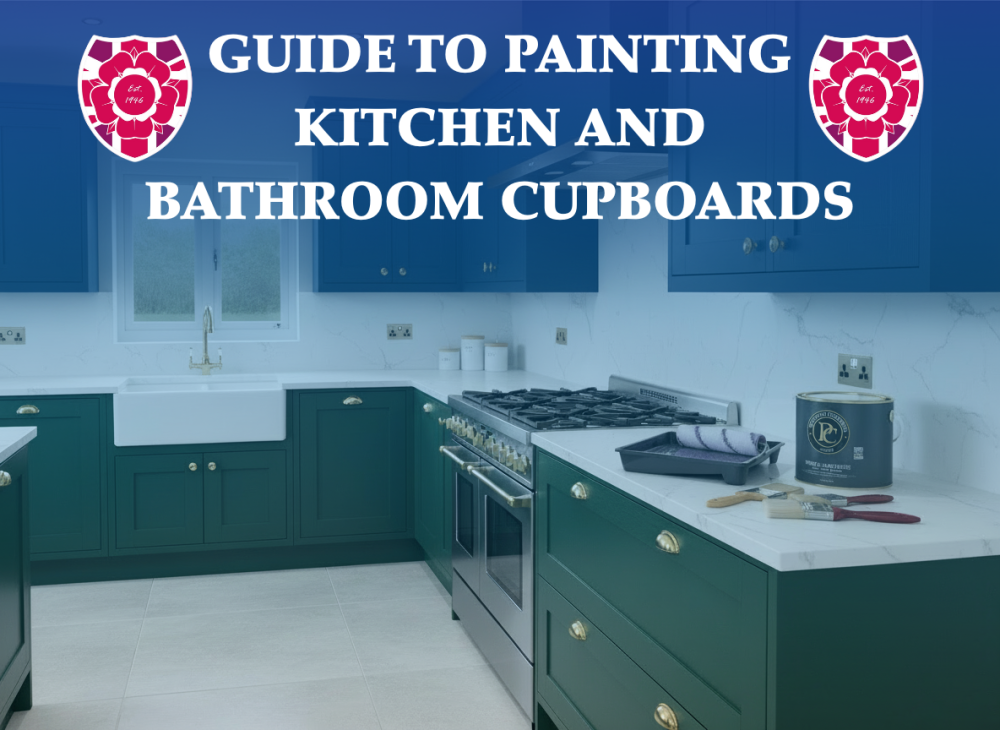
Guide to Painting Kitchen & Bathroom Cupboards with Palatine Professional Cupboard Paint
19
Dec
Dec
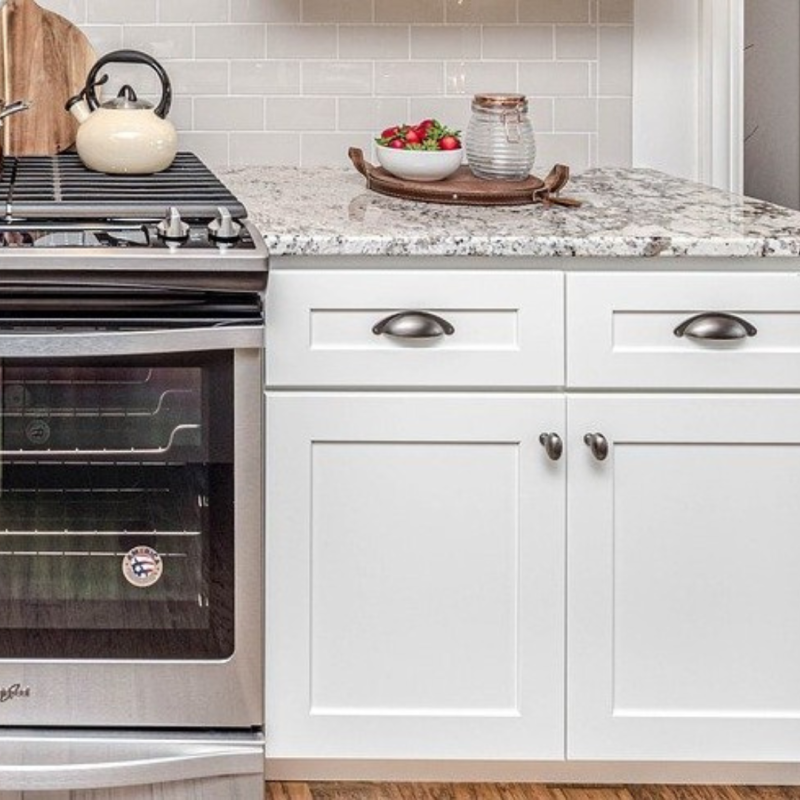
If your kitchen looks tired, it doesn’t always mean you need a brand‑new one. In many homes, the layout works, the cupboards are sound – it’s just the finish that’s dated. With the right preparation and a professional‑grade cupboard paint, you can achieve a “new kitchen” look without the cost and disruption of a full refit.
In this guide, we will walk through how to paint cupboards using Palatine Professional Cupboard Paint, covering why it’s a smart alternative to replacement, plus preparation, application, and aftercare so you get a durable, professional finish that lasts.
Why paint cupboards instead of replacing your kitchen?
Full kitchen replacements are expensive, disruptive and often unnecessary. In a lot of properties, the carcasses and layout are perfectly sound – it’s just the doors and drawer fronts that look worn, yellowed or out of date.
.
Painting cupboards with Palatine Professional Cupboard Paint is a smart alternative, because it:
-
Costs a fraction of a new kitchen: New units, worktops, appliances, fitting and disposal quickly add up. Repainting existing cupboards gives you a “new kitchen” look on a much smaller budget, freeing up spend for other improvements (lighting, flooring, appliances).
-
Avoids major disruption and mess: A full refit can mean days or weeks of joiners, plumbers and electricians on site, plus dust, noise and no usable kitchen. Cupboard painting can usually be completed in stages, keeping the kitchen largely functional throughout.
-
Is faster from start to finish: Once you’ve chosen your colour and done the prep, most projects can be completed over a weekend or a few evenings – no long lead times for new units or worktops.
-
Reduces waste and is more sustainable: Ripping out perfectly serviceable cupboards sends a lot of material to landfill. Re‑using what you already have and upgrading the finish is a more sustainable option, especially when the underlying units are still structurally sound.
-
Lets you keep a layout that already works: If your kitchen layout is practical, there’s no need to redesign it. A fresh, modern colour on the cupboards can completely change the feel of the room while keeping a layout you’re already happy with.
-
Gives you more control over the final look: With a professional cupboard paint system, you can choose from a wide range of colours and finishes to match worktops, tiles and flooring – rather than being limited to the standard options in kitchen showrooms.
For many homeowners, landlords and facilities managers, painting cupboards with a durable, professional‑grade coating is the most efficient way to modernise a kitchen or staff area without the cost and downtime of a full replacement.
Why choose Palatine Professional Cupboard Paint?
Palatine Professional Cupboard Paint is designed specifically for kitchen and bathroom cupboards, where surfaces are exposed to:
- Frequent handling and abrasion
- Grease, steam, splashes, and cleaning chemicals
- Changes in temperature and humidity
Key benefits of using paint specifically designed for cupboards:
- Excellent adhesion to properly prepared wood and many laminates
- A hard‑wearing and durable finish suitable for high‑traffic areas
- A smooth, professional appearance with good flow and levelling
- Available in a range of attractive and modern colours
- Compatible with brush or roller application for on‑site refurbishment
Always refer to the Technical Data Sheet (TDS) for full details on substrates, coverage, and drying times.
Step 1: Assess your cupboards
Before you start, you should check:
- The condition of the substrate – are doors sound, not swollen, rotten, or badly damaged?
- The material – solid wood, MDF, or laminate. This affects prep and priming.
- The existing coating – is it flaking, glossy, or previously varnished/painted?
If the cupboards are badly swollen, delaminated, or structurally unsound, a replacement may be more appropriate. Otherwise, they’re usually good candidates for painting.
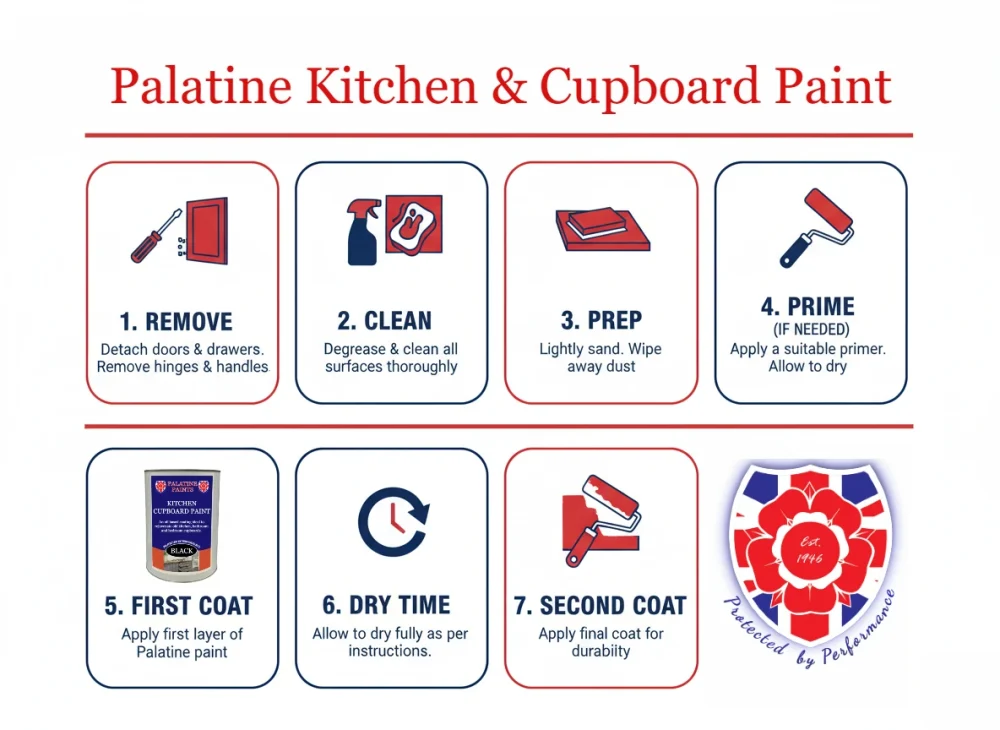
Step 2: Remove hardware and protect surrounding areas
For a neater job and easier application:
- Remove doors and drawer fronts where possible.
- Take off handles, knobs, and any removable hardware.
- Label doors and hinges so you can refit them in the correct positions.
- Mask off hinges, glass panels, and other areas you don’t want to paint.
- Protect worktops, floors, and appliances with dust sheets or masking paper.
Taking a little extra time here will save you from messy edges and accidental splashes later.
Step 3: Clean and degrease thoroughly
Kitchens especially can have invisible layers of grease and contamination that will prevent adhesion.
- Wash all surfaces with a good degreasing cleaner or sugar soap solution.
- Pay particular attention to areas around handles and near hobs.
- Rinse with clean water and allow to dry completely.
If there is silicone residue or furniture polish build‑up, you may need additional cleaning or light sanding to remove it.
Step 4: Sand and key the surface
To help Palatine Professional Cupboard Paint bond effectively:
- Lightly sand the surfaces with fine abrasive paper (e.g. 180–240 grit).
- Aim to dull the sheen rather than remove all existing paint.
- Feather back any minor flaking or damaged areas.
- Vacuum or wipe away dust with a tack cloth.
For very glossy or previously varnished surfaces, a slightly more thorough sanding is recommended to ensure a good mechanical key.
Step 5: Prime where necessary
Depending on the substrate and existing finish, a suitable primer may be required for best adhesion and stain blocking. Typical scenarios:
- Bare MDF or timber: Use an appropriate wood/MDF primer or sealer.
- Glossy or previously coated surfaces: An adhesion‑promoting primer may be beneficial.
- Stained or tannin‑rich woods (e.g. certain hardwoods): A stain‑blocking primer can help prevent bleed‑through.
Allow the primer to dry in line with the manufacturer’s instructions before applying Palatine Professional Cupboard Paint.
If you’re unsure which primer to use for your specific cupboards, contact our technical team with details of your substrate and existing coating.
Step 6: Application of Palatine Professional Cupboard Paint
Once surfaces are clean, dry, sanded, and primed where needed, you’re ready to apply Palatine Professional Cupboard Paint.
Tools:
- High‑quality synthetic bristle brush for cutting in and edges
- Short‑pile mini roller (foam or microfibre) for flat panels
- Paint tray and liners
- Stirring stick
Mixing and conditions:
- Stir the paint thoroughly before use to ensure uniform colour and consistency.
- Apply in dry, well‑ventilated conditions, avoiding very cold, very hot, or humid environments.
- Ideal temperature is typically between 10–25°C (check the TDS for exact recommendations).
First coat:
- Start with the edges and profiles using a brush.
- Use the roller on the larger, flat areas, working in smooth, even passes.
- Avoid over‑working the paint; allow it to level out for a smoother finish.
- Check for runs or sags on edges and mouldings and brush them out immediately.
Allow the first coat to dry for the recommended recoat time stated in the Technical Data Sheet.
Second coat:
- Lightly denib between coats with very fine abrasive (e.g. 320–400 grit) if necessary, then remove dust.
- Apply a second coat in the same way, maintaining a wet edge to avoid lap marks.
Two coats are usually sufficient for good coverage and durability, although very strong colour changes may require an additional coat.
Step 7: Drying, curing, and reassembly
It’s important to distinguish between touch dry, recoat, and full cure:
- Touch dry: Surface feels dry, but film is not fully hardened.
- Recoat time: Minimum time before applying the next coat.
- Full cure: The coating has reached maximum hardness and chemical resistance.
Follow the drying and curing times in the TDS. As a general guide:
- Refit doors and hardware only once the paint is firm enough to handle without marking.
- Avoid heavy use, aggressive cleaning, or stacking items against freshly painted surfaces until the coating has fully cured.
When refitting:
- Handle doors carefully to avoid chipping fresh edges.
- Re‑install handles and knobs, checking that they don’t scuff the new coating.
Care and maintenance of painted cupboards
To keep your refurbished cupboards looking their best:
- Clean with a soft cloth or sponge and a mild detergent solution.
- Avoid abrasive pads, harsh chemicals, or scouring powders.
- Wipe up spills promptly, especially in high‑use kitchen areas.
- Check for any knocks or chips and touch up promptly to maintain protection.
With correct preparation and application, Palatine Professional Cupboard Paint provides a durable, attractive finish suitable for everyday kitchen and bathroom use.
Common questions about painting cupboards
Can I paint laminate cupboards?
– Many laminate surfaces can be painted, provided they are thoroughly cleaned, lightly abraded, and correctly primed. Always test a small, inconspicuous area first to confirm adhesion.
– Many laminate surfaces can be painted, provided they are thoroughly cleaned, lightly abraded, and correctly primed. Always test a small, inconspicuous area first to confirm adhesion.
Do I need to remove the doors?
– You can paint doors in situ, but removing them often makes preparation and application easier and helps achieve a more even finish.
– You can paint doors in situ, but removing them often makes preparation and application easier and helps achieve a more even finish.
How long will the finish last?
– Service life depends on preparation, application, and usage. In normal domestic conditions, a properly applied system will give long‑term performance, especially compared with standard decorative paints not designed for cupboards.
– Service life depends on preparation, application, and usage. In normal domestic conditions, a properly applied system will give long‑term performance, especially compared with standard decorative paints not designed for cupboards.
Ready to transform your kitchen without replacing it?
If you’re planning a kitchen or bathroom refresh, Palatine Professional Cupboard Paint offers a professional‑grade solution for refurbishing cupboards without the cost, waste and disruption of a full replacement.